Custom Domain and HTTPS
Set up Hosted Zone in Route 53
If you bought your domain in AWS you will already have a hosted zone so this section is mainly for users who purchased their domain elsewhere. If you did not purchase your domain with AWS you will want to create a hosted zone in AWS.
Click Create Hosted Zone and enter your domain example.com with type Public Hosted Zone.
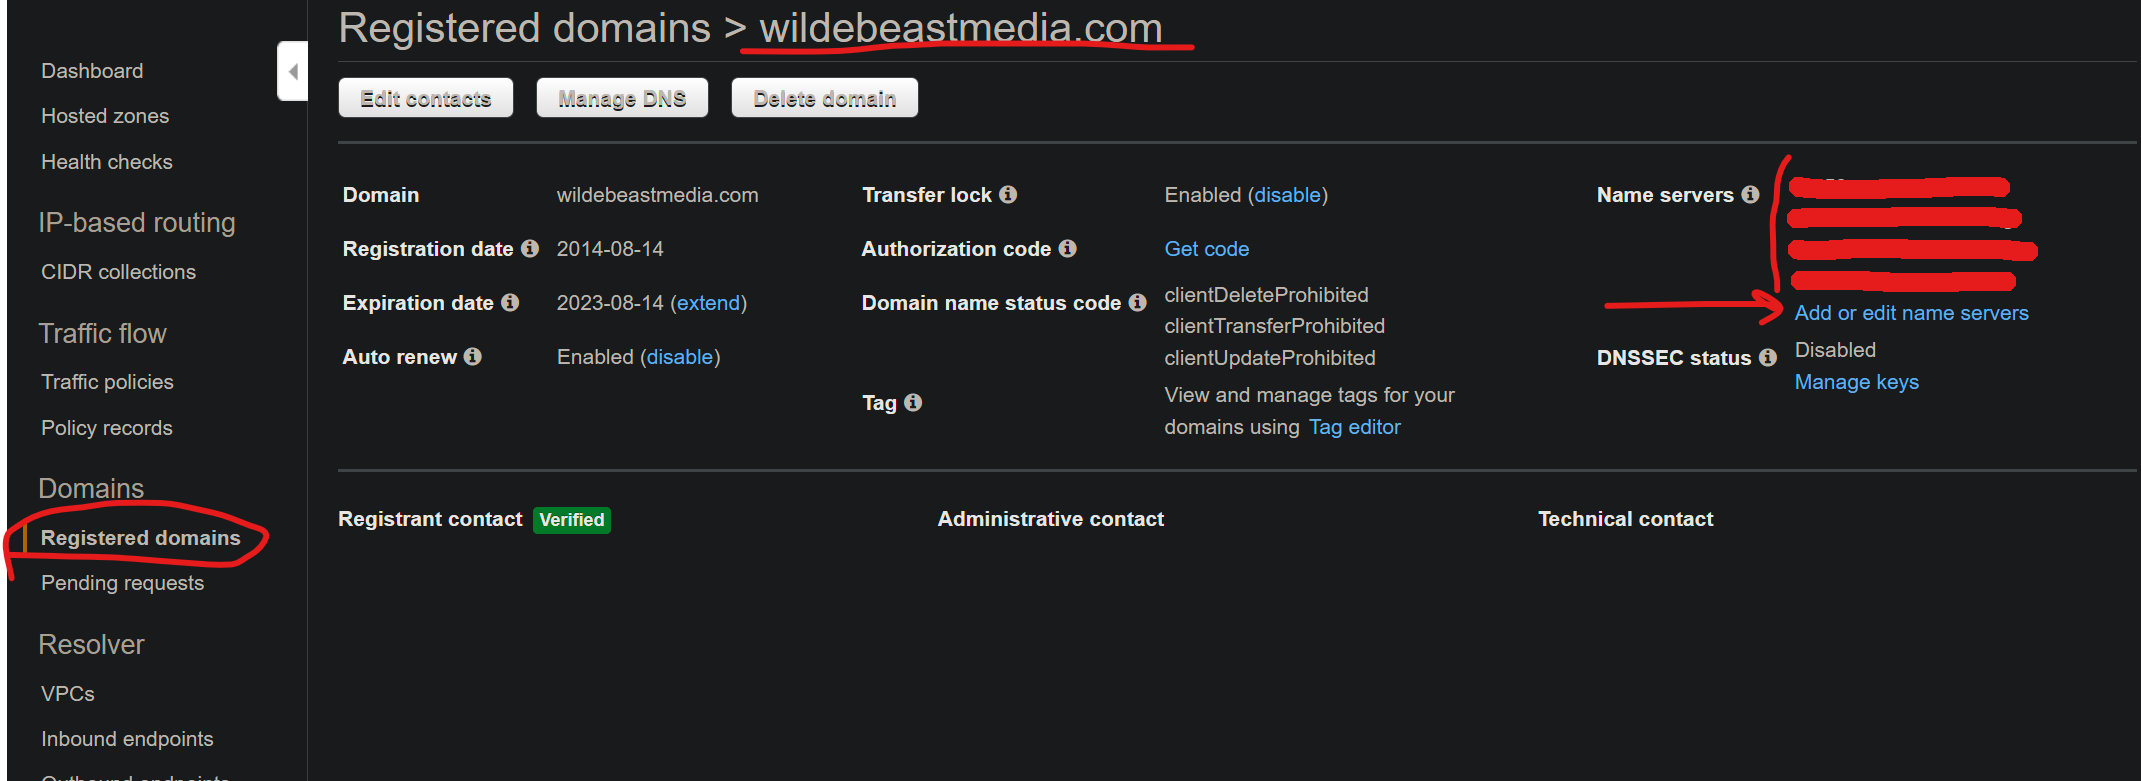
Copy the ns values from your newly created hosted zone to nameserver settings for your domain.
Wherever you purchased your domains, you will want to edit the same servers and past the NS value from the AWS Hosted Zone.
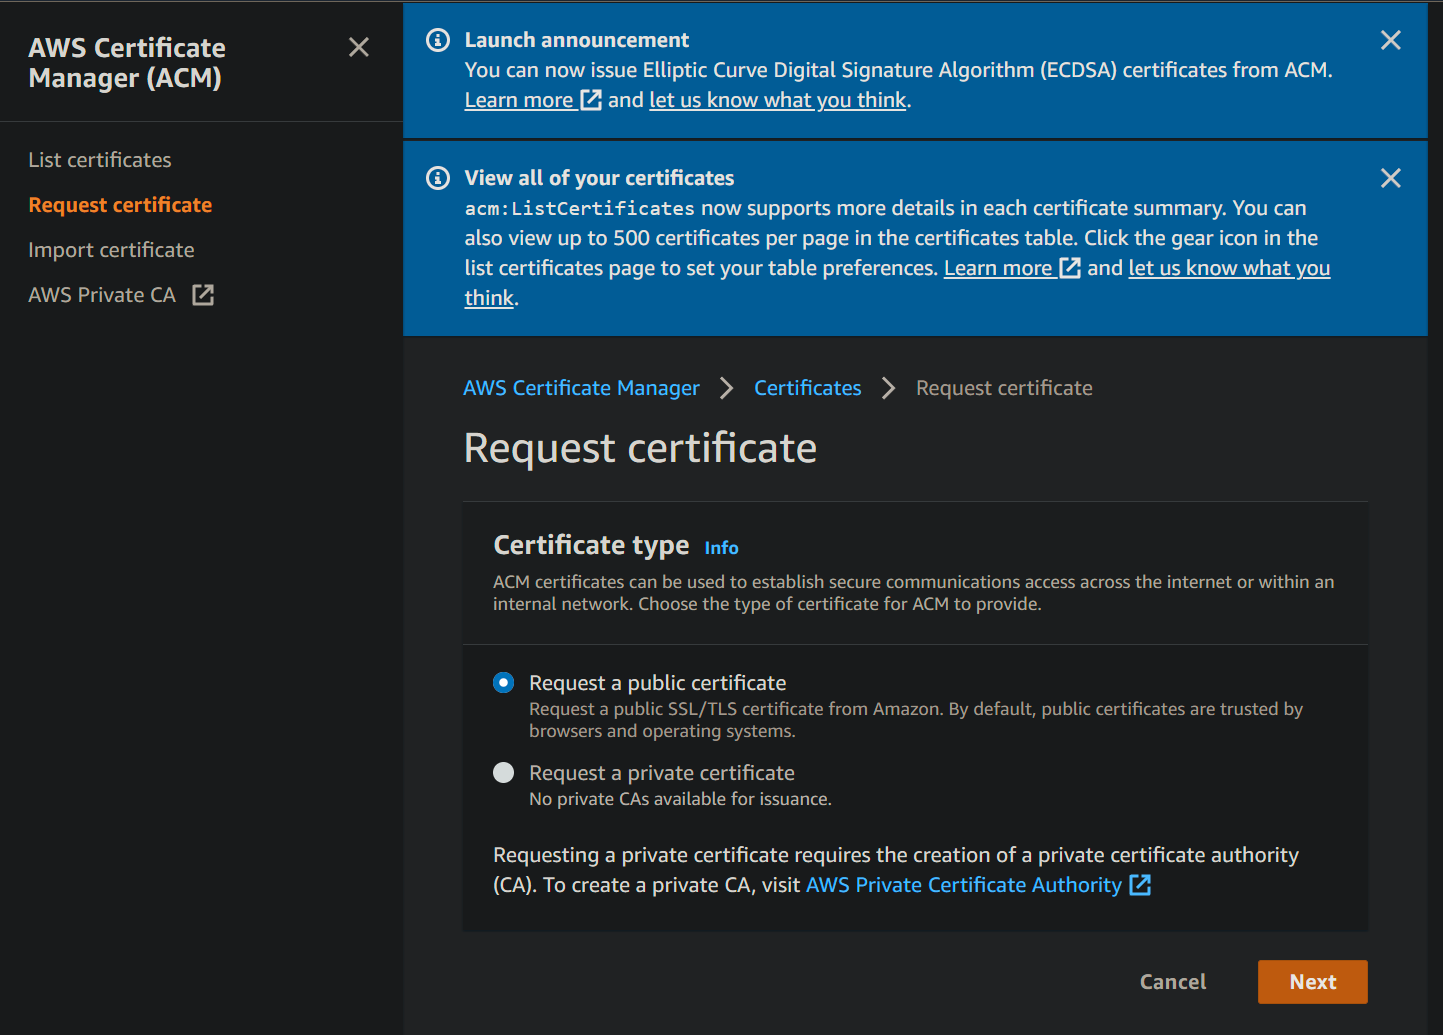
AWS Certificate Manager (SSL Certs)
Ensure the us-east-1 region is selected as Cloud Front needs this (top right of dashboard). More info on this here https://aws.amazon.com/certificate-manager/faqs/
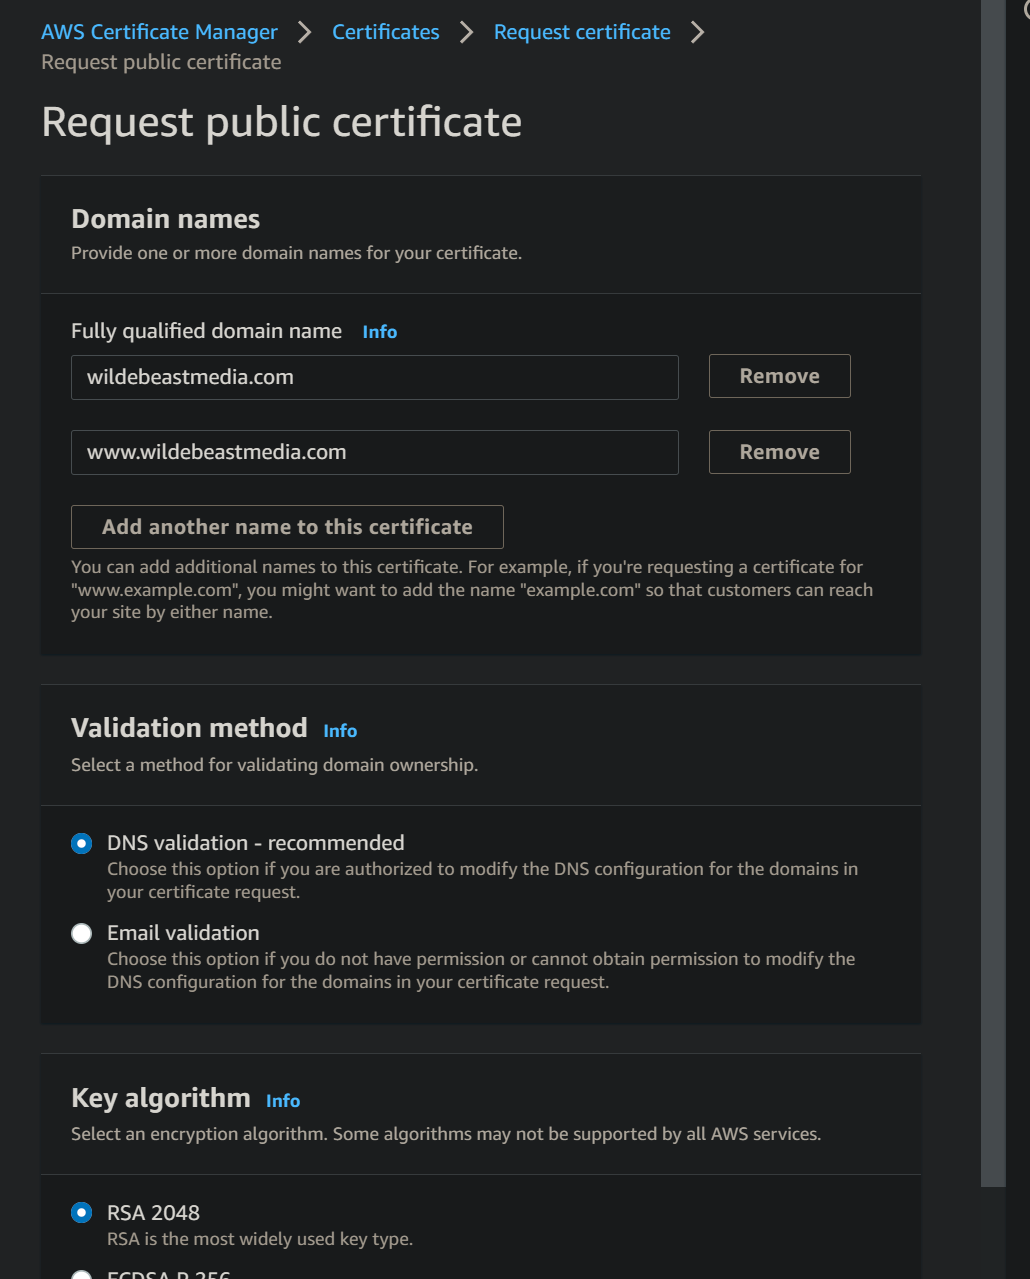
- Add your domain example.com and your domain with the
wwwsubdomain www.example.com then clickNext - Select
DNS Validationthen clickNext - Click
Review - Click
Confirm and Request
- Expand the area for each domain and click
Create record in route53 - Click
Continue
AWS Cloud Front (CDN)
- Click
Create Distribution

- Under
WebclickGet Started - Under
Origin Domain Nameenter the S3 Site Endpoint you made a note of earlier. It should be in the format bucket.name.s3-website-aws-region.amazonaws.com -
Under
Viewer Protocol Policy, selectredirect http to https -
Under
Price classselectuse only US, Canada and Europe. Users outside these regions will experience more latency but this is cheaper - Under
Alternate Domain Names (CNAMEs)enter your apex domain (example.com) and then on a new line enter your domain with thewwwsubdomain (www.example.com) - Under
SSL CertificateselectCustom SSL Certificateand choose the Certificate we just created in AWS Certificate Manager - Under
Default Root Objectenterindex.html - Click
Create Distribution
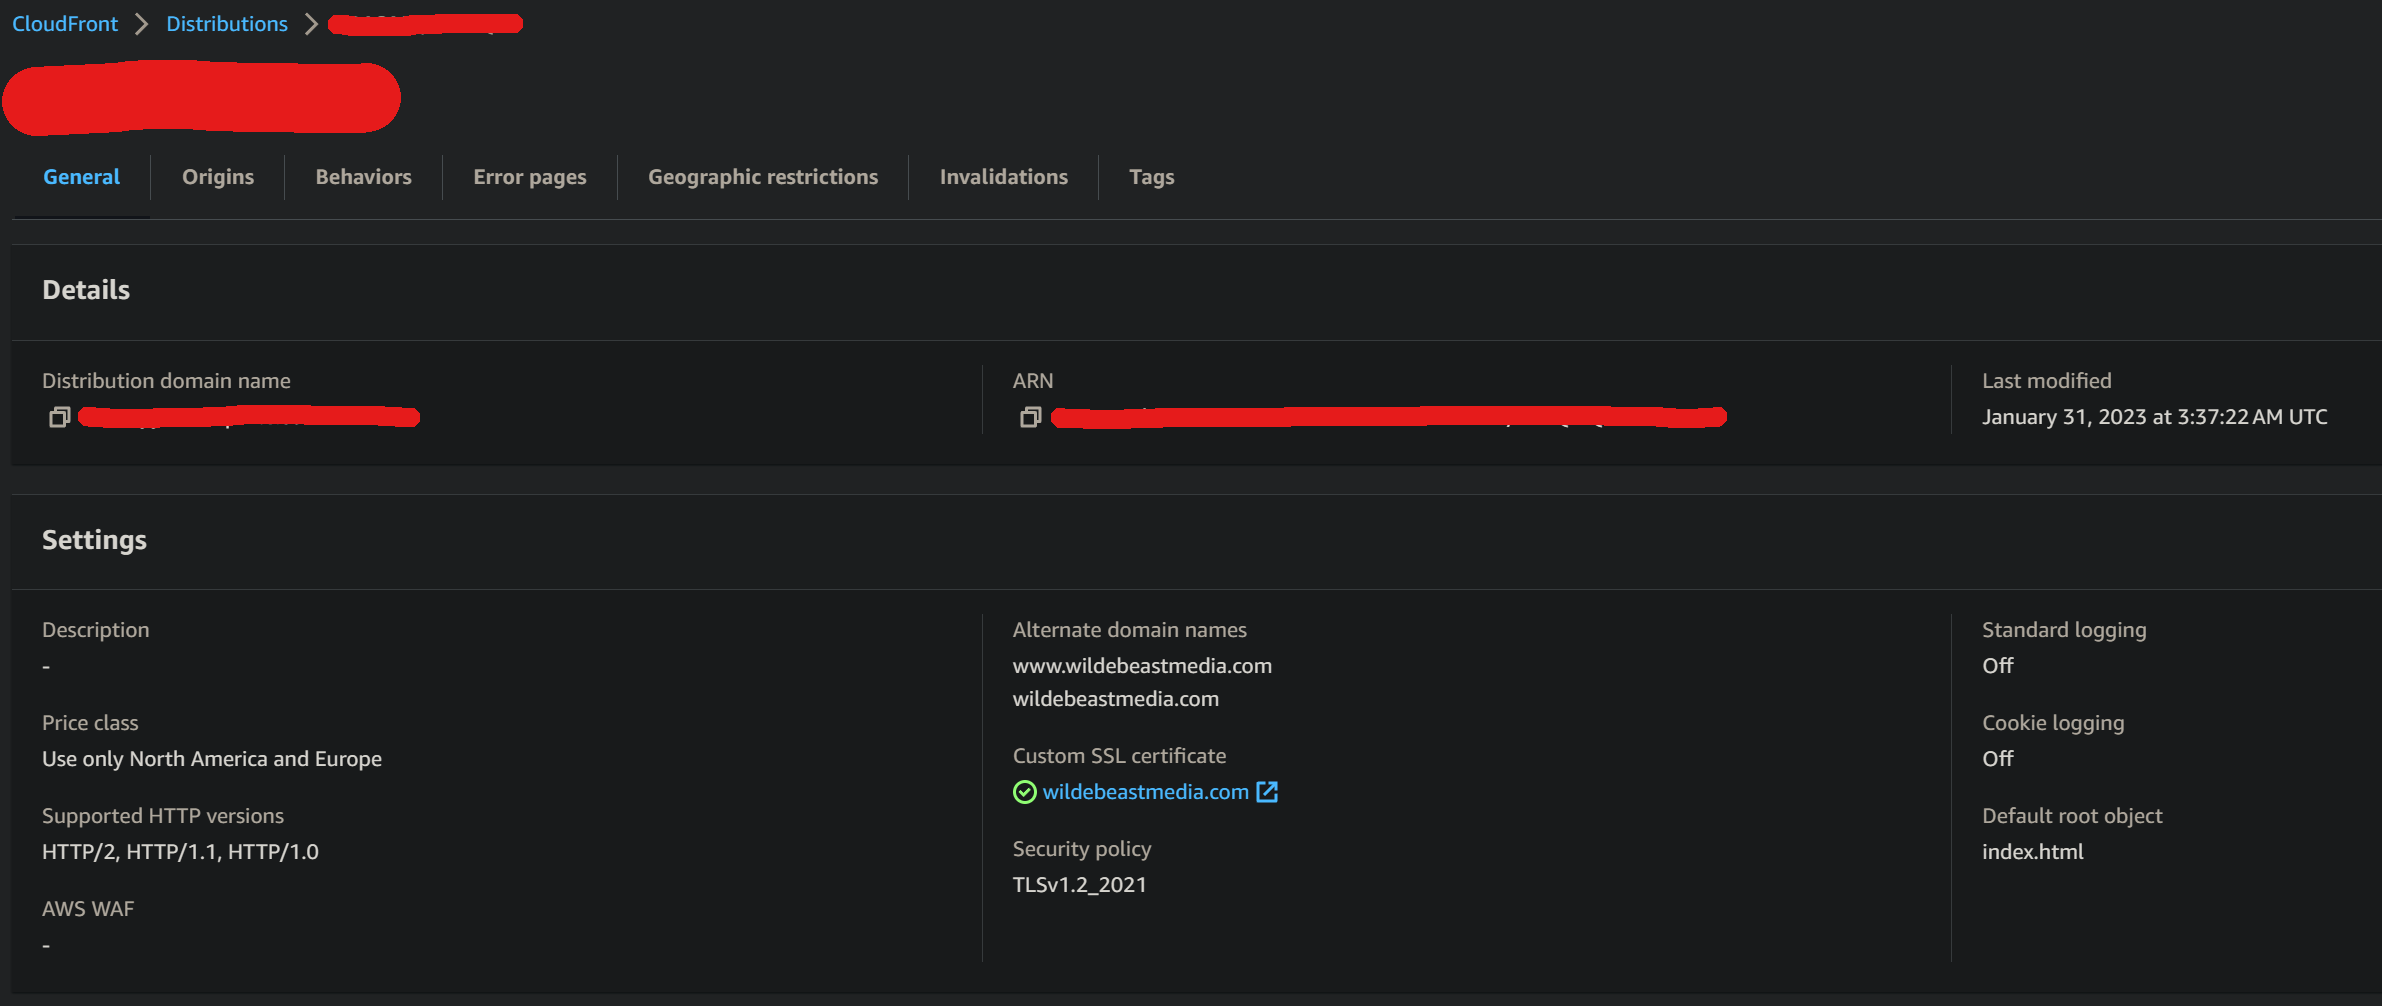
This may take several minutes for the distribution to be created.
Route 53 (Route to Cloud Front)
- Click
Hosted Zones - Click your domain example.com
- Click
Create Record Setand leave name blank SetAliastoYesSelectAlias Targetand select the Cloud Front deployment that we created earlier from the dropdown Click Create - Repeat as above but enter
wwwas the name this time.
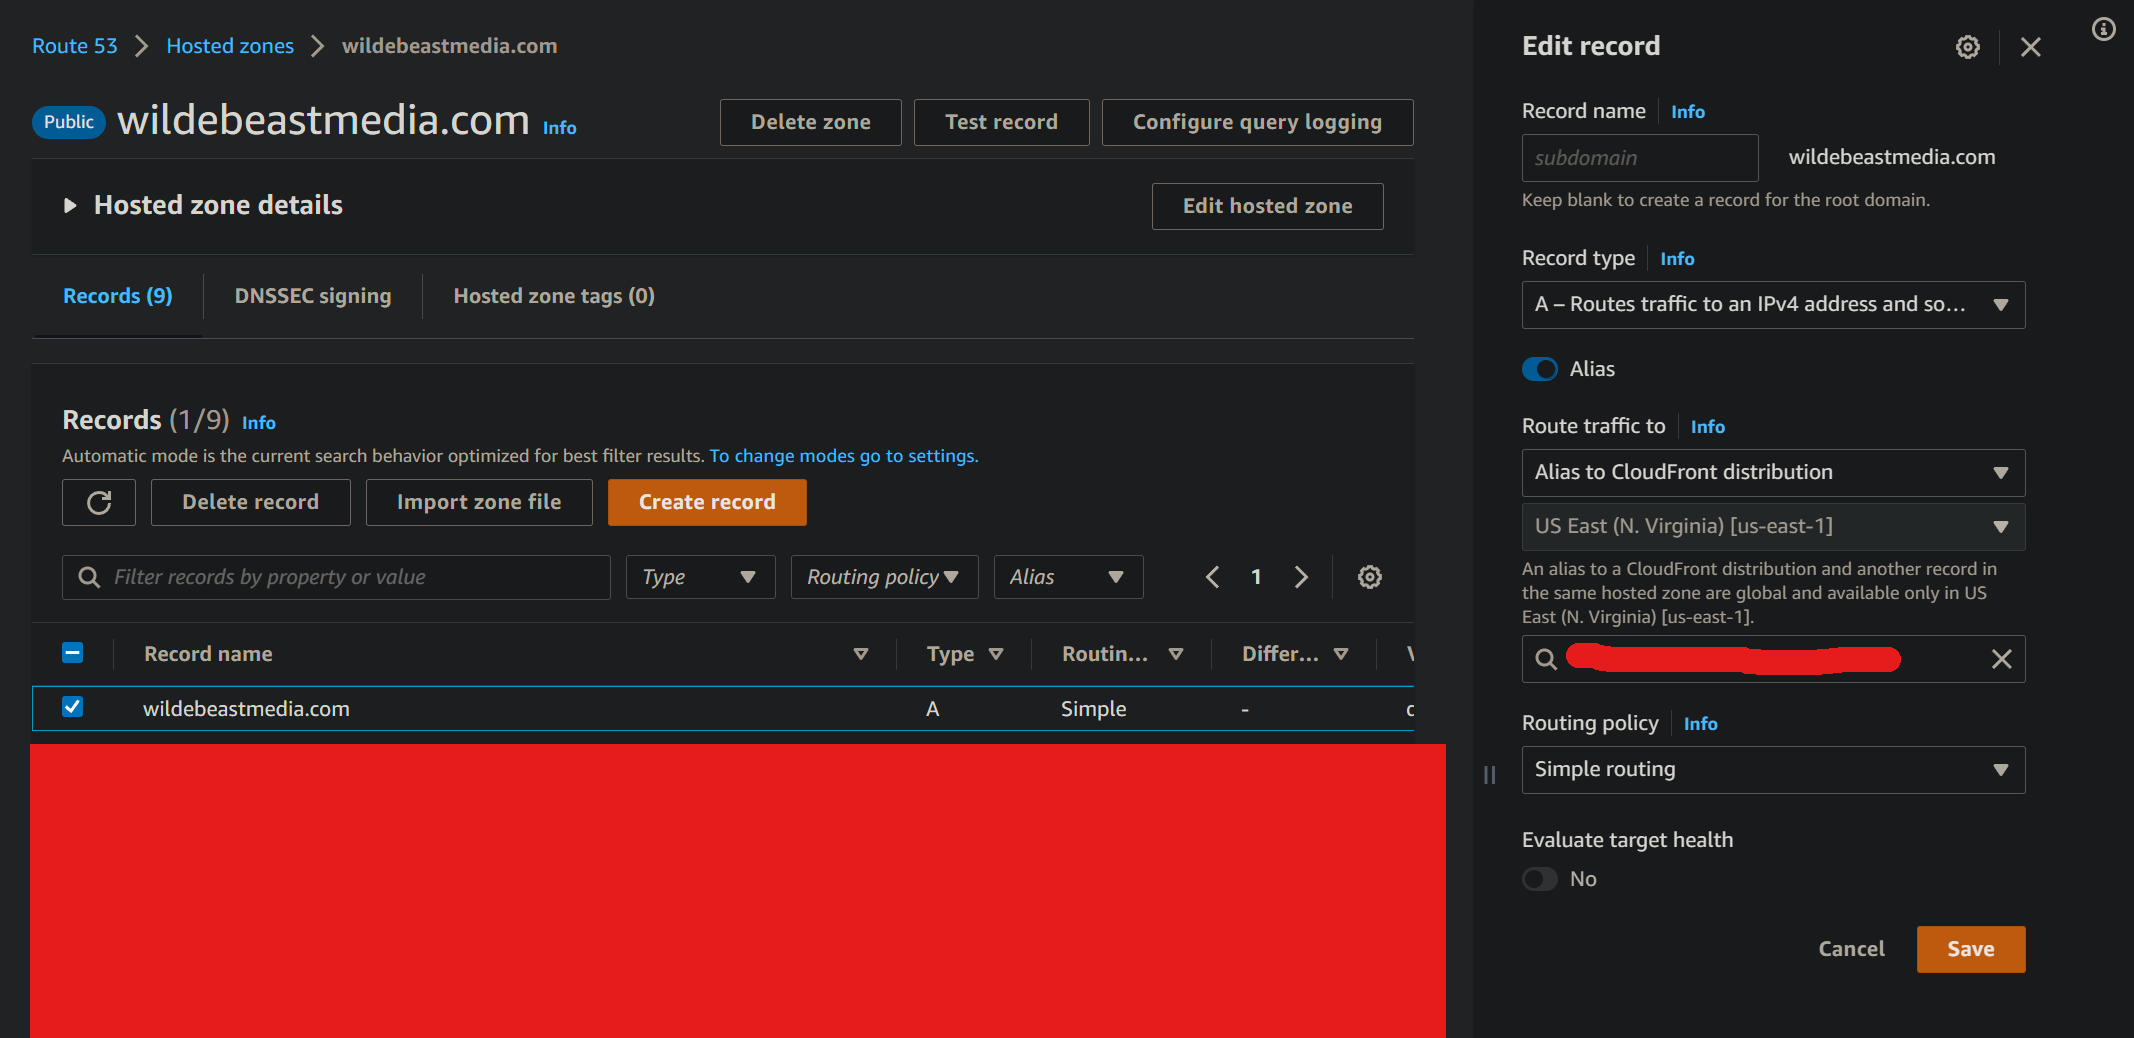
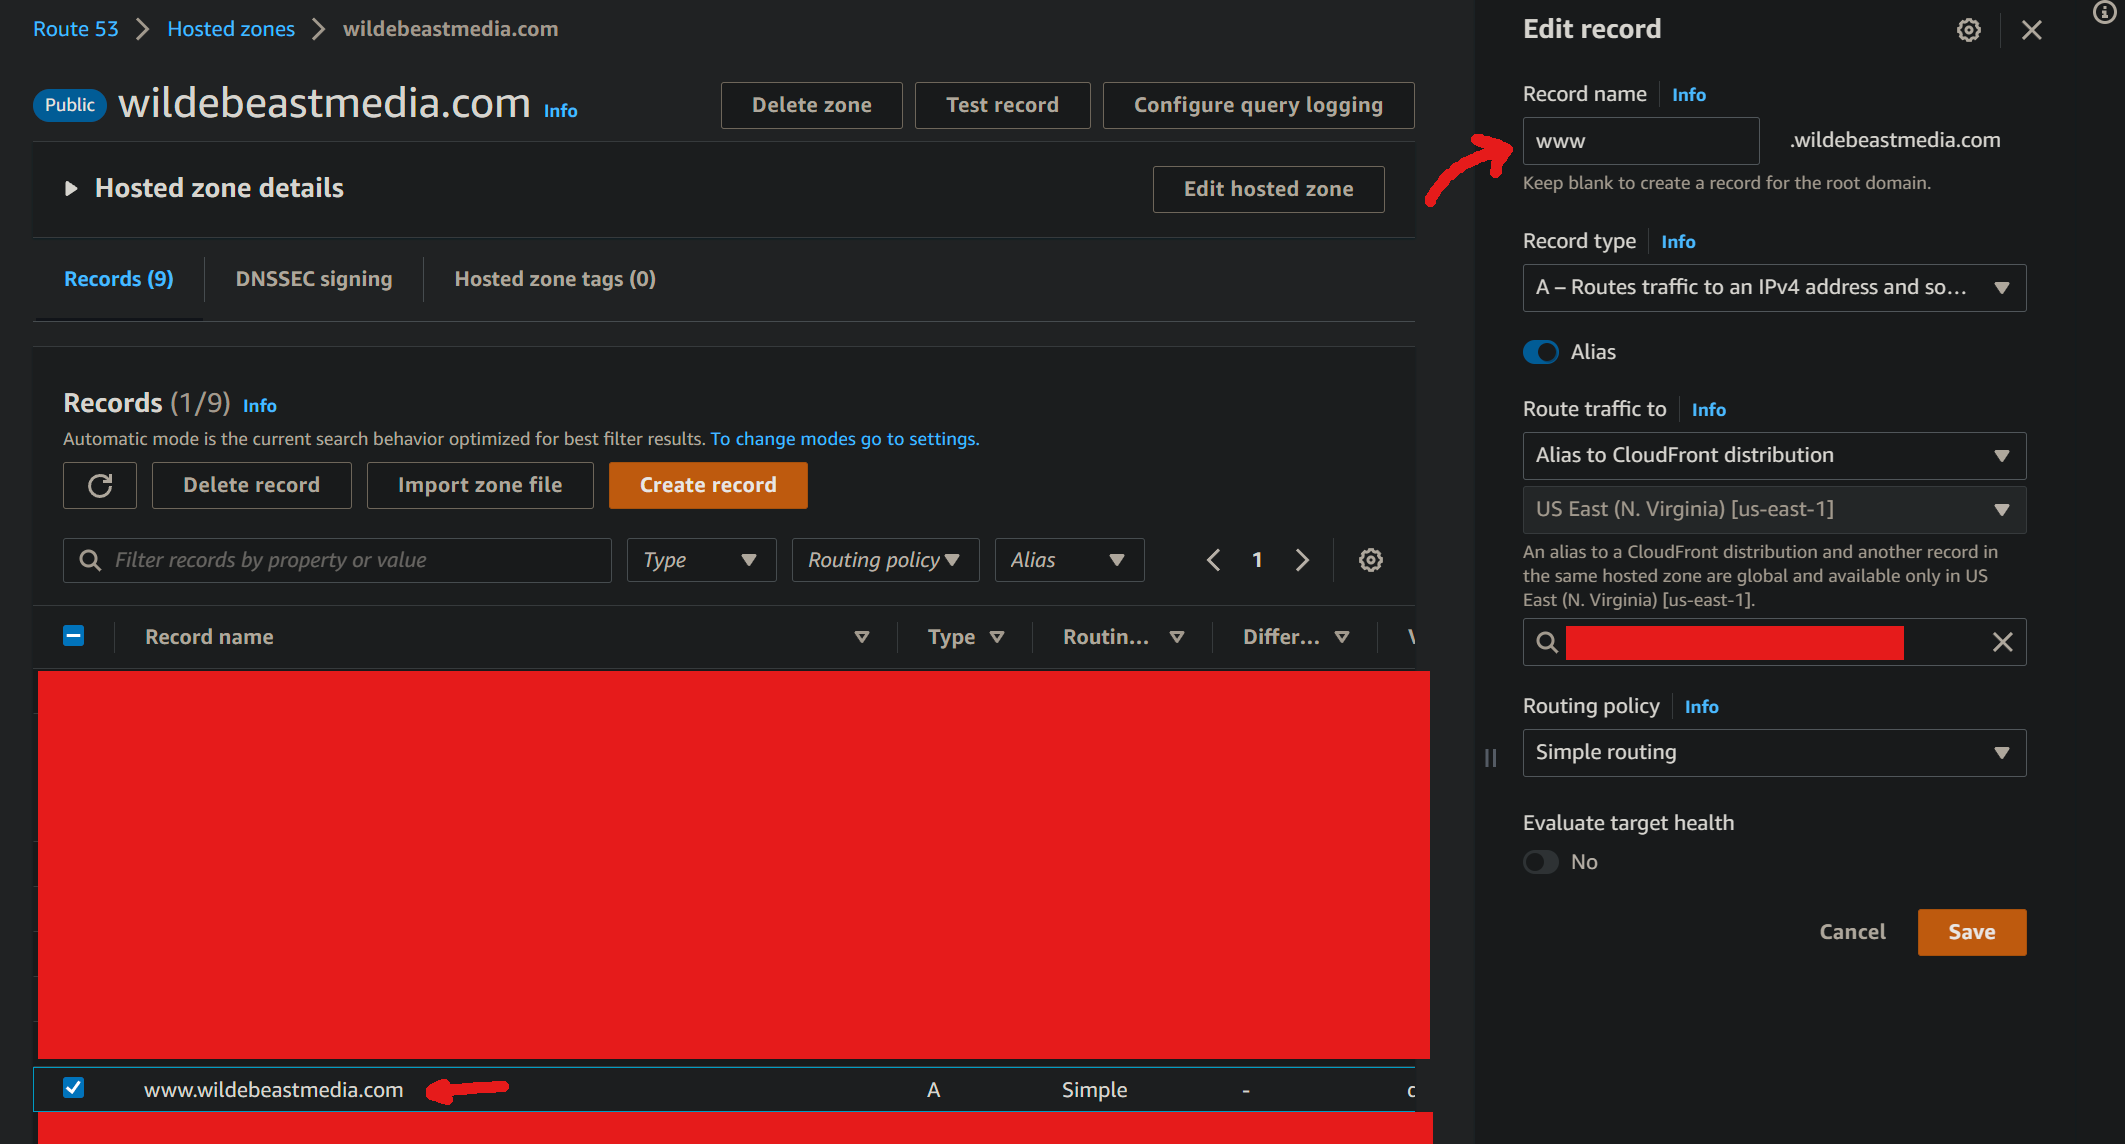
Your site should now be live under https://example.com and https://www.example.com