Seafile
Seafile is a self-hosted, dropbox like solution, that also has client apps for desktop and mobile that are free and open source, allowing you to connect to your server many many devices.
Prerequisites
Get Docker installed. Setup is quite fast, see my documentation.
Server Configuration
Download the docker-compose.yml file per the official documentation. I like to download this file to home/<my-username>/docker/seafile.
Now if you take a look at the official documentation or the docker-compose.yml, you'll see a few properties that we need to change, including MYSQL_ROOT_PASSWORD, seafile -> volumes, DB_ROOT_PASSWD, as well as the seafile port.
services:
  db:
    image: mariadb:10.11
    container_name: seafile-mysql
    environment:
      - MYSQL_ROOT_PASSWORD=[REDACTED]  # Requested, set the root's password of MySQL service.
      - MYSQL_LOG_CONSOLE=true
      - MARIADB_AUTO_UPGRADE=1
    volumes:
      #- /opt/seafile-mysql/db:/var/lib/mysql  # Requested, specifies the path to MySQL data persistent store.
      - /home/thomas/docker/seafile/mysql:/var/lib/mysql
    networks:
      - seafile-net

  memcached:
    image: memcached:1.6.18
    container_name: seafile-memcached
    entrypoint: memcached -m 256
    networks:
      - seafile-net

  seafile:
    image: seafileltd/seafile-mc:latest
    container_name: seafile
    ports:
      - "<port on your server>:80"
    volumes:
      - <PATH TO STORAGE>:/shared   # Requested, specifies the path to Seafile data persistent store.
    environment:
      - DB_HOST=db
      - DB_ROOT_PASSWD=[REDACTED]  # Requested, the value should be root's password of MySQL service.
      - TIME_ZONE=Etc/UTC  # Optional, default is UTC. Should be uncomment and set to your local time zone.
      - [email protected] # Specifies Seafile admin user, default is '[email protected]'.
      - SEAFILE_ADMIN_PASSWORD=[REDACTED]     # Specifies Seafile admin password, default is 'asecret'.
      - SEAFILE_SERVER_LETSENCRYPT=false   # Whether to use https or not.
      - SEAFILE_SERVER_HOSTNAME=[REDACTED] # Specifies your host name if https is enabled.
    depends_on:
      - db
      - memcached
    networks:
      - seafile-net

networks:
  seafile-net:
Note, that I am running nginx on my server itself and I want to expose a different port than port 80 to the docker port 80 (nginx is running on port 80).
Start Docker
We should now be able to access Seafile on the local network with the following URL:
Nginx Config
Create a server block for seafile.<mydomain>.com.
log_format seafileformat '$http_x_forwarded_for $remote_addr [$time_local] "$request" $status $body_bytes_sent "$http_referer" "$http_user_agent" $upstream_response_time';

server {

    listen 80;
    listen [::]:80;

    server_name seafile.mydomain.com;

    proxy_set_header X-Forwarded-For $remote_addr;

    location / {
        proxy_pass         http://localhost:<configured port>;
        proxy_set_header Host              $http_host;
        proxy_set_header X-Real-IP         $remote_addr;
        proxy_set_header X-Forwarded-For   $proxy_add_x_forwarded_for;
        proxy_set_header X-Forwarded-Proto $scheme;

        # http://nginx.org/en/docs/http/websocket.html
        proxy_http_version 1.1;
        proxy_set_header   Upgrade    $http_upgrade;
        proxy_set_header   Connection "upgrade";

         access_log      /var/log/nginx/seahub.access.log seafileformat;
         error_log       /var/log/nginx/seahub.error.log;
    }
}
Save this file.
Enable the site.
Let's just test our nginx config real quick to make sure there were no syntax issues.
Configure DNS Routing
Before we set up certbot, we need to configure routing for the domain or subdomain that we want to route to our home server.
For AWS users, simply go to Hosted Zones, choose the domain that you want to create a record for, and hit Create Record. In our example here, were are using a subdomain seafile. The record will be a CNAME, which allows use to forward traffic to the DDNS we created with No-IP. Hit save. Now we have a CNAME routing for seafile.mydomain.com which will forward traffic to our DDNS aka our home server.
Configure SSL (HTTPS)
Let's install our SSL certificates so that we make sure our site always uses HTTPS.
We should get a Congratulations! message from certbot.
Let's test our configuration once again.
And now restart the nginx service.
The config file should now look something like this:
log_format seafileformat '$http_x_forwarded_for $remote_addr [$time_local] "$request" $status $body_bytes_sent "$http_referer" "$http_user_agent" $upstream_response_time';

server {
    server_name seafile.mydomain.com;

    proxy_set_header X-Forwarded-For $remote_addr;

    location / {
        proxy_pass         http://localhost:<configured_port>;
        proxy_set_header Host              $http_host;
        proxy_set_header X-Real-IP         $remote_addr;
        proxy_set_header X-Forwarded-For   $proxy_add_x_forwarded_for;
        proxy_set_header X-Forwarded-Proto $scheme;

        # http://nginx.org/en/docs/http/websocket.html
        proxy_http_version 1.1;
        proxy_set_header   Upgrade    $http_upgrade;
        proxy_set_header   Connection "upgrade";

        access_log      /var/log/nginx/seahub.access.log seafileformat;
        error_log       /var/log/nginx/seahub.error.log;
    }


    listen 443 ssl; # managed by Certbot
    ssl_certificate /etc/letsencrypt/live/seafile.mydomain.com/fullchain.pem; # managed by Certbot
    ssl_certificate_key /etc/letsencrypt/live/seafile.mydomain.com/privkey.pem; # managed by Certbot
    include /etc/letsencrypt/options-ssl-nginx.conf; # managed by Certbot
    ssl_dhparam /etc/letsencrypt/ssl-dhparams.pem; # managed by Certbot

}


server {
    if ($host = seafile.mydomain.com) {
        return 301 https://$host$request_uri;
    } # managed by Certbot


    listen 80;
    server_name seafile.mydomain.com;
    return 404; # managed by Certbot


}
You should now be able to connect to seafile via https.
Troubleshooting
If you have issues connecting via Https, check the following.
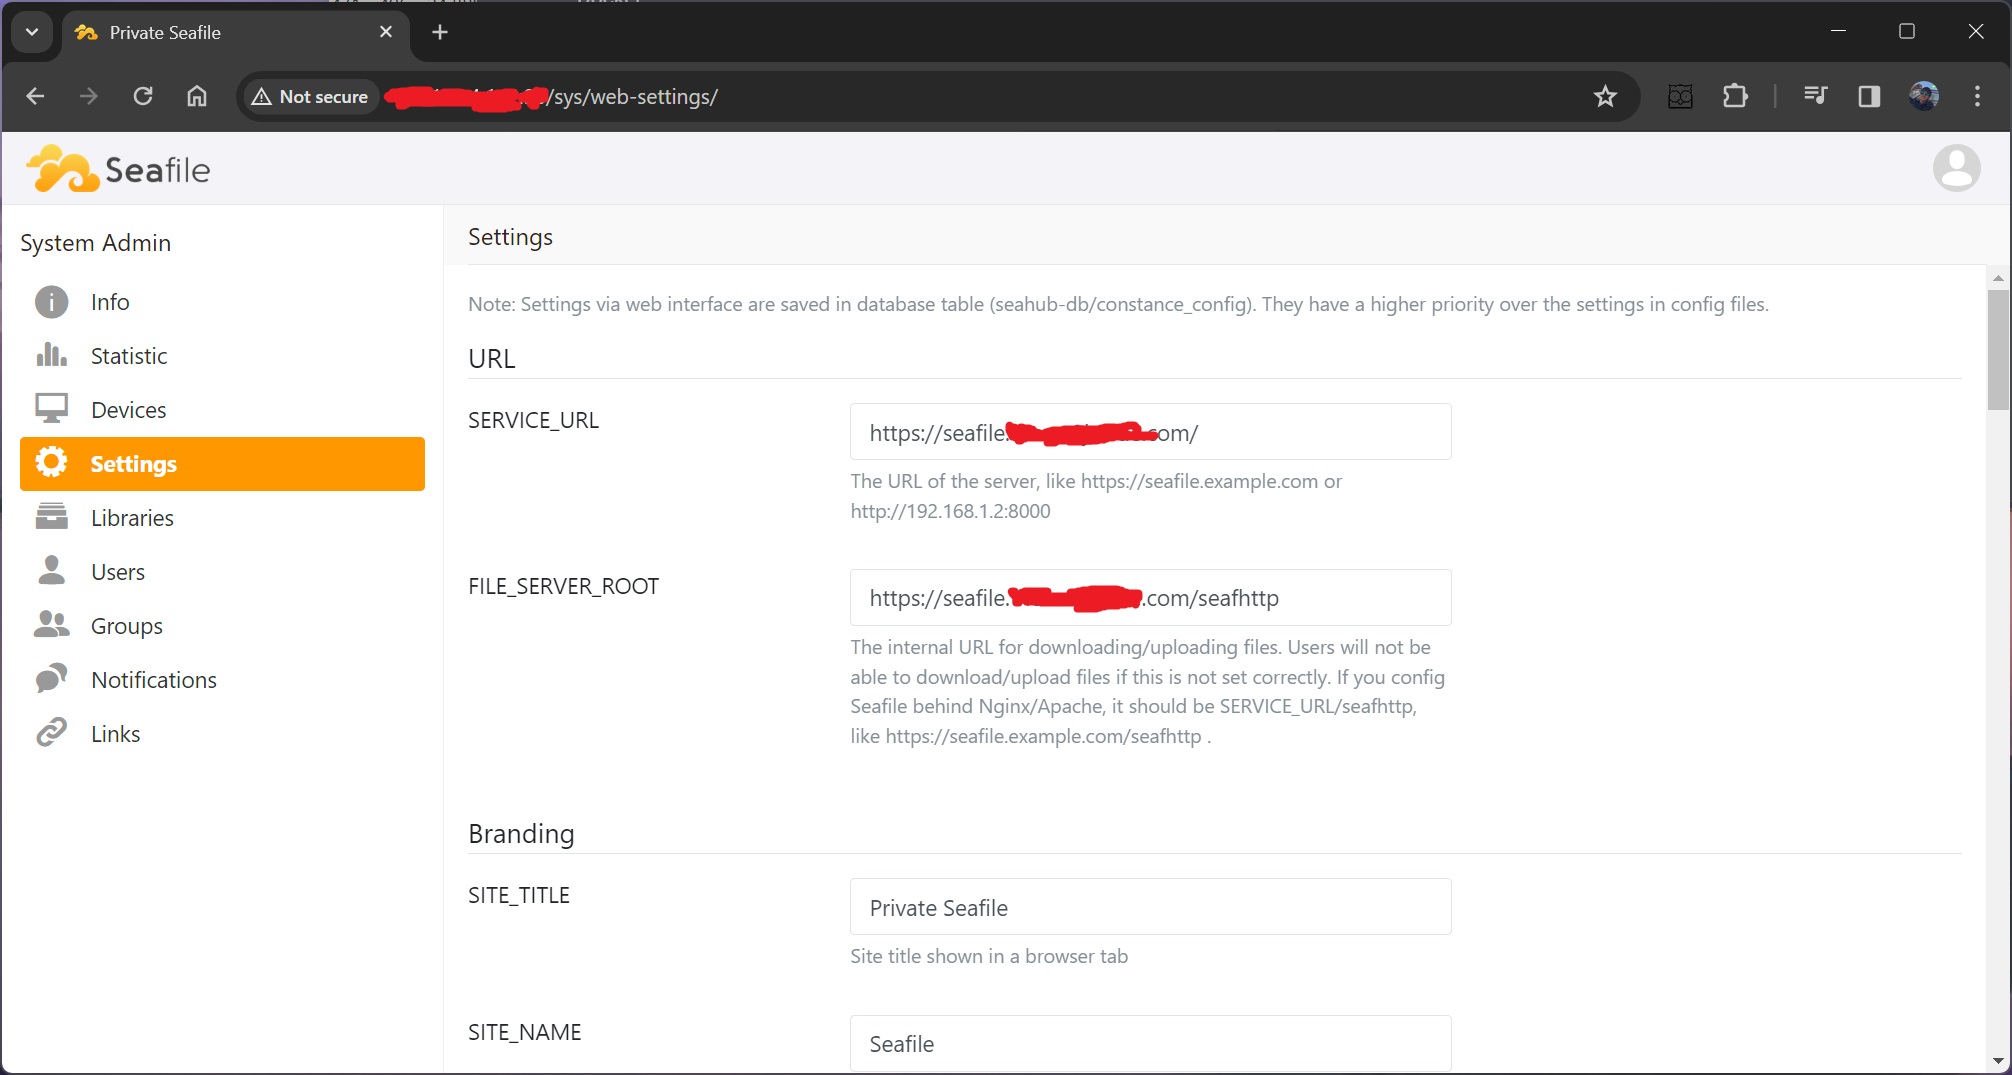
- Check the Admin settings SERVICE_URL.
It should say https.
- Check
seahub_settings.py
This file is located in
Check that the SERVICE_URL AND FILE_SERVER_ROOT have https.
If the issue persists, you can also try adding the following to seahub_settings.py.
Versioning
Specifying the latest version for seafile did end up breaking Seafile for me. I noticed that a couple of new versions had been released since I had originall installed the container. I reverted back to the specific version I had been using and this fixed the issue for me.