Bare Metal (Port Forward)
Setting up a web server on our home server will allow us to configure web traffic to any application running on our server that we want to expose to the web.
Install and enable Nginx
Update our package lists.
Install nginx.
Start nginx.
Enable Nginx to start on boot.
Verify installation.
Set up a simple index.html for testing.
We're going to follow the same methodology that is documented for setting up web content on AWS.
To quickly review. I'm going to configure a subdomain of a domain that I own (mydomain.com) to be routed to my home server. Let's do mysub.mydomain.com.
Set up a directory for the web content.
Info
Make sure to replace <my-user> your Ubuntu user account you are using.
Ensure proper permissions.
Create an index.html file:
Inside the file, we’ll create a really basic file that indicates what site we are currently accessing. It will look like this:
<html>
    <head>
        <title>Thomas' Home Network</title>
    </head>
    <body>
        <h1>Hey, you're on my home network</h1>
    </body>
</html>
nano, press CTRL+o to write the file out, then CTRL+x to exit.
Create a Server Block
Navigate to the nginx directory.
The sites-available and sites-enabled folders should already be there, but just in case, let's try to create them.
Navigate into the sites-available directory.
Let's create our config file.
And we'll paste this config in here:
server {
    listen 80;
    listen [::]:80;
    root /var/www/mysub.mydomain.com/html;
    index index.html index.htm;
    server_name mysub.mydomain.com;
    location / {
            try_files $uri $uri/ =404;
    }
}
Info
Obviously replace the root /var/www/mysub.mydomain.com/html with the path to your static content. Also replace the server_name value mysub.mydomain.com with the domain that is being routed to the root.
Enable the site
Install Let's Encrypt Certbot for SSL encryption (HTTPS)
Configure routing with your DNS provider and open ports.
This should be similar with all DNS provides but I will share a screenshot of my AWS hosted zone.
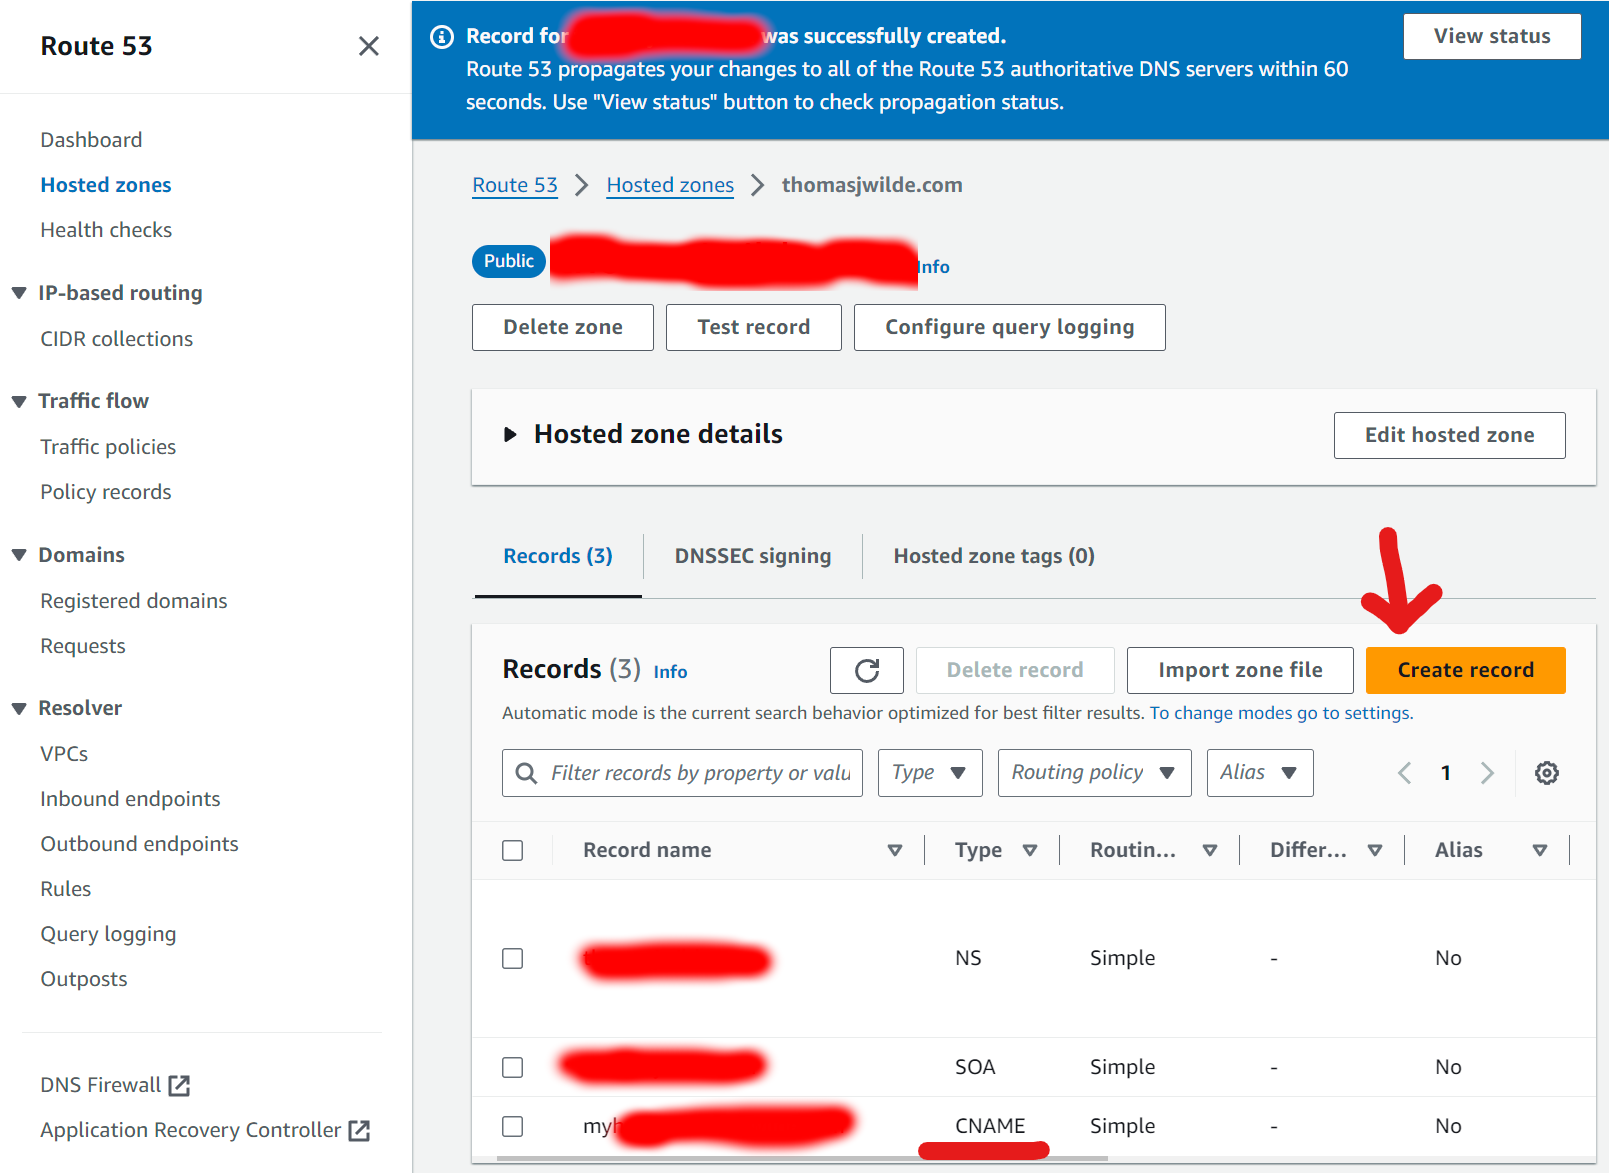
We're going to click Create Record and create a CNAME simple routing record, which will allow us to route our subdomain to our DDNS domain name. (If you haven't set up a DDNS, review the documentation). Alternatively, you can create an A record but you would have to route to your IP address, which of course, will change eventually.
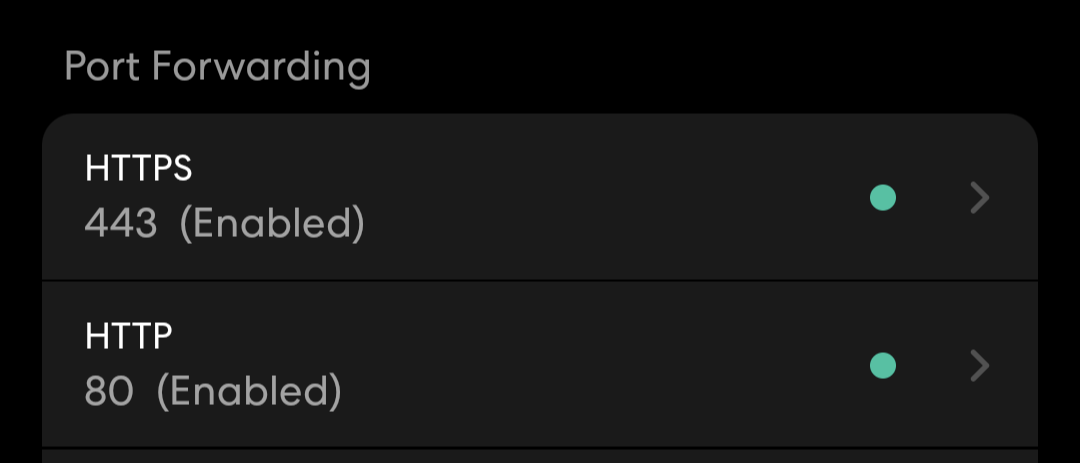
Open Port Forwarding to your Server IP Address
Open up port forwarding on your router configuration for 80 and 443 for HTTP and HTTPS traffic.
Then open the ports on the server's firewall.
Install certbot and request a certificate
We want to make sure nginx uses SSL for all web traffic for a secure connection.
Install certbot.
Now request a certificate
You should see the following
Check server block
Let's see how the certbot modified our server block.
server {
    root /var/www/mysub.mydomain.com/html;
    index index.html index.htm;
    server_name mysub.mydomain.com;
    location / {
            try_files $uri $uri/ =404;
    }

    listen [::]:443 ssl ipv6only=on; # managed by Certbot
    listen 443 ssl; # managed by Certbot
    ssl_certificate /etc/letsencrypt/live/mysub.mydomain.com/fullchain.pem; # managed by Certbot
    ssl_certificate_key /etc/letsencrypt/live/mysub.mydomain.com/privkey.pem; # managed by Certbot
    include /etc/letsencrypt/options-ssl-nginx.conf; # managed by Certbot
    ssl_dhparam /etc/letsencrypt/ssl-dhparams.pem; # managed by Certbot

}
server {
    if ($host = mysub.mydomain.com) {
        return 301 https://$host$request_uri;
    } # managed by Certbot


    listen 80;
    listen [::]:80;
    server_name mysub.mydomain.com;
    return 404; # managed by Certbot
}
Note that we have two server blocks. The top one, which listens for ssl traffic on 443, and the bottom one which listens for http traffic and redirects it to https.
Testing
And there we go! We now have a secure domain which is routed to our server, converted to https via our Nginx reverse proxy, and ultimately to our static html page we configured.
