Sonatype Nexus
Having an artifact repository is impartive for version control of artifacts and is companion for CI/CD pipelines
Pulling Docker Image
Hosting your own artifact repository is quite simply with Sonatype Nexus Repository. We can pull the docker image using this docker-compose.yml.
version: "3"
services:
  nexus:
    image: sonatype/nexus3
    restart: always
    volumes:
      - /mnt/md0/apps/nexus/nexus-data:/nexus-data
    ports:
      - "<desired-port-1>:8081"
      - "<desired-port-2>:8085"
volumes:
  nexus-data: {}
Inside of the parent folder of the docker-compose.yml, spin up the docker image.
When the application is up and running you'll need to grab the default admin password inside the docker container at /nexus-data/admin.password. I just accessed it using docker desktop. You can then sign in as the admin by navigating to localhost:<desired-port-1>
Nginx Block
Let's enable a domain in our nginx config.
Navigate to the sites-available.
Create our block.
Paste the following configuration
server {
    listen 80;
    listen [::]:80;

    # replace with your domain or subdomain
    server_name nexus.<my-domain>.com

    location / {
        proxy_pass http://localhost:<desired-port-1>;
        proxy_set_header Host              $http_host;
        proxy_set_header X-Real-IP         $remote_addr;
        proxy_set_header X-Forwarded-For   $proxy_add_x_forwarded_for;
        proxy_set_header X-Forwarded-Proto $scheme;
        proxy_set_header X-Forwarded-Port  $server_port;

    }
}
Replace 'my-domain'
Just remember to replace
Save this file.
Enable the site.
Let's just test our nginx config real quick to make sure there were no syntax issues.
Configure DNS Routing
Before we set up certbot, we need to configure routing for the domain or subdomain that we want to route to our home server.
For AWS users, simply go to Hosted Zones, choose the domain that you want to create a record for, and hit Create Record. In our example here, were are using a subdomain nexus. The record will be a CNAME, which allows use to forward traffic to the DDNS we created with No-IP. Hit save. Now we have a CNAME routing for nexus.mydomain.com which will forward traffic to our DDNS aka our home server.
Configure SSL (HTTPS)
Let's install our SSL certificates so that we make sure our site always uses HTTPS.
We should get a Congratulations! message from certbot.
Let's test our configuration once again.
And now restart the nginx service.
First Sign in as Admin
When you sign in the first time, the username will be "admin", and you will need to find the initial password at the following location: /nexus-data/admin.password.
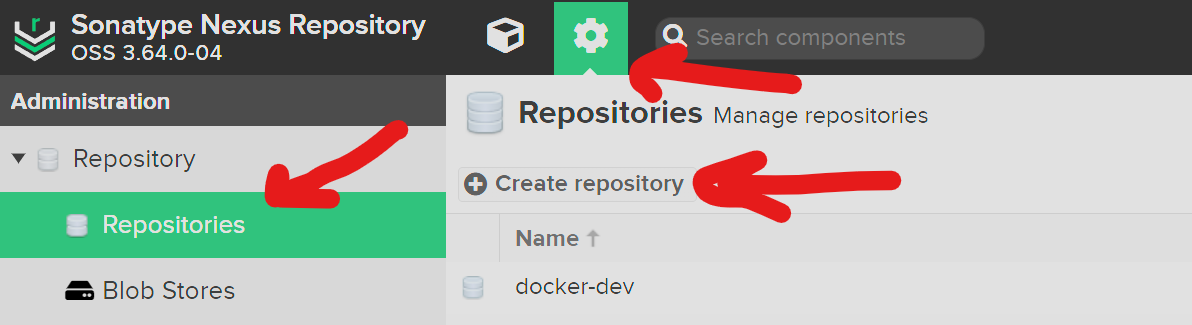
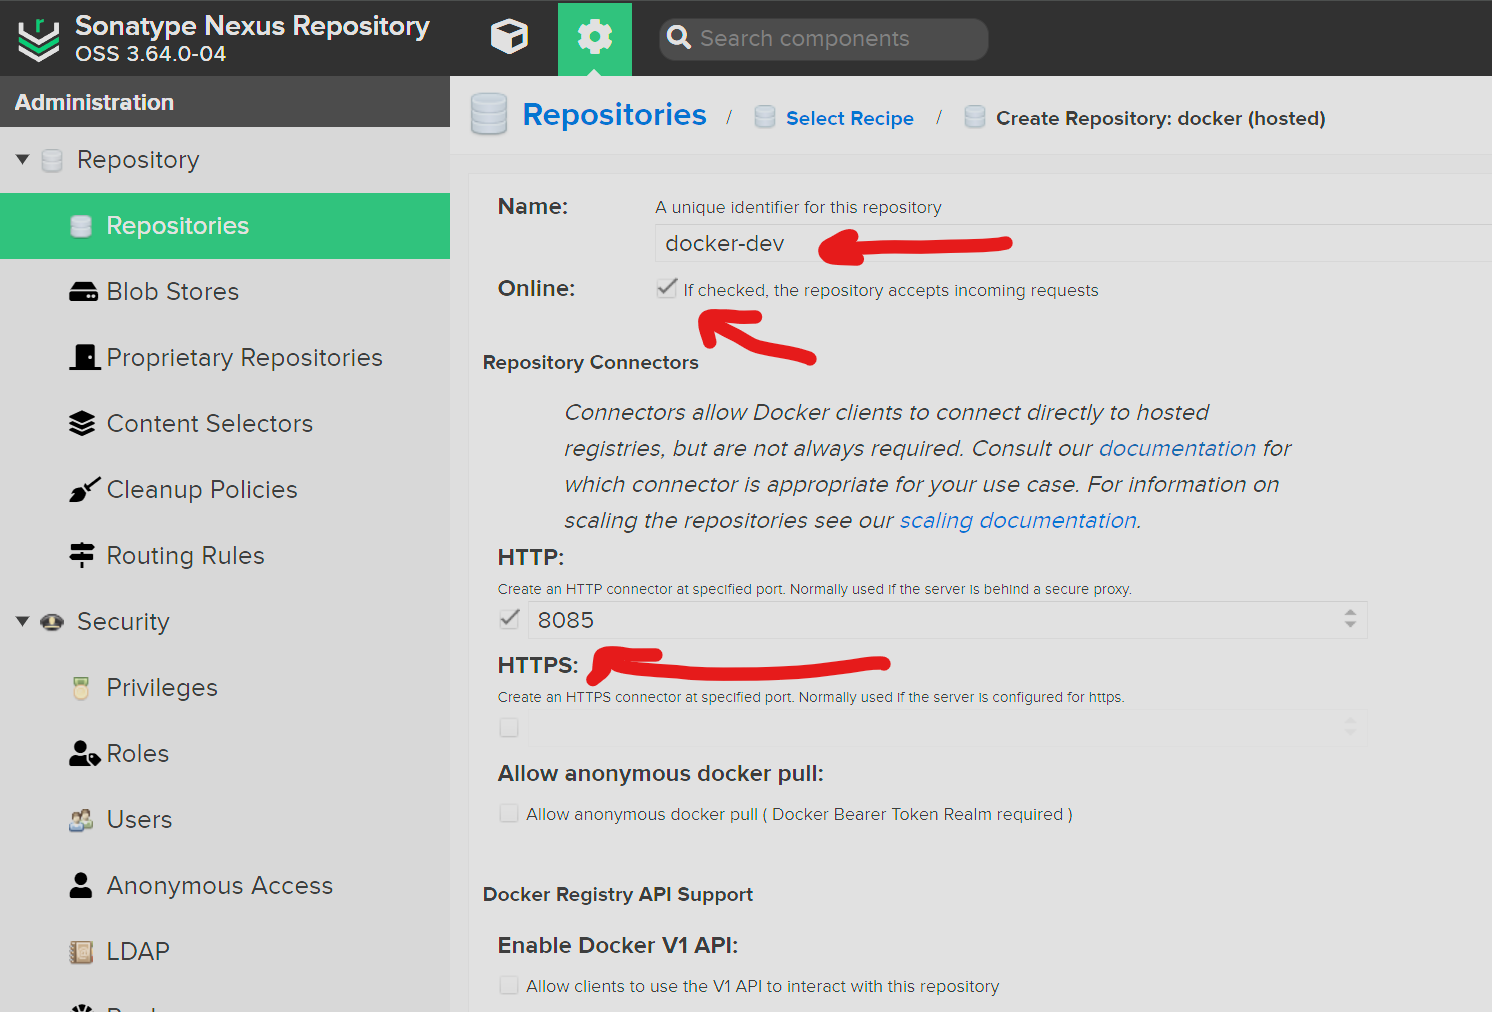
Creating a Docker Repository
Because we're running nexus behind our nginx proxy, we only need to use the HTTP connector because we'll already be sending requests to the server with SSL.
This is where the second port will come in handy that we opened in our docker-compose.yml file, 8085. We're going to use that for our Docker api access which runs on a different port than the Nexus web application.
For simplicity to connecting to the Docker api to push and pull images, I find it cleaner to create a separate sub-domain, i.e. docker.mydomain.com. Configure DNS routing just like you did previously.
server {
    listen 80;
    listen [::]:80;

    # replace with your domain or subdomain
    server_name docker.<my-domain>.com

    location / {
        proxy_pass http://localhost:<desired-port-2>;
        proxy_set_header Host              $http_host;
        proxy_set_header X-Real-IP         $remote_addr;
        proxy_set_header X-Forwarded-For   $proxy_add_x_forwarded_for;
        proxy_set_header X-Forwarded-Proto $scheme;
        proxy_set_header X-Forwarded-Port  $server_port;

    }
}
Make sure to install your SSL certs with certbot for the docker subdomain.
You will now be able to use docker on your PC to push images to your own private Docker Hub repo.
Login:
Enter username and password for Nexus.
You should see Login Succeeded.
You can now build and push your docker image
docker build -t docker.mydomain.com/repo-name/app-name:latest .
docker push docker.mydomain.com/repo-name/app-name:latest
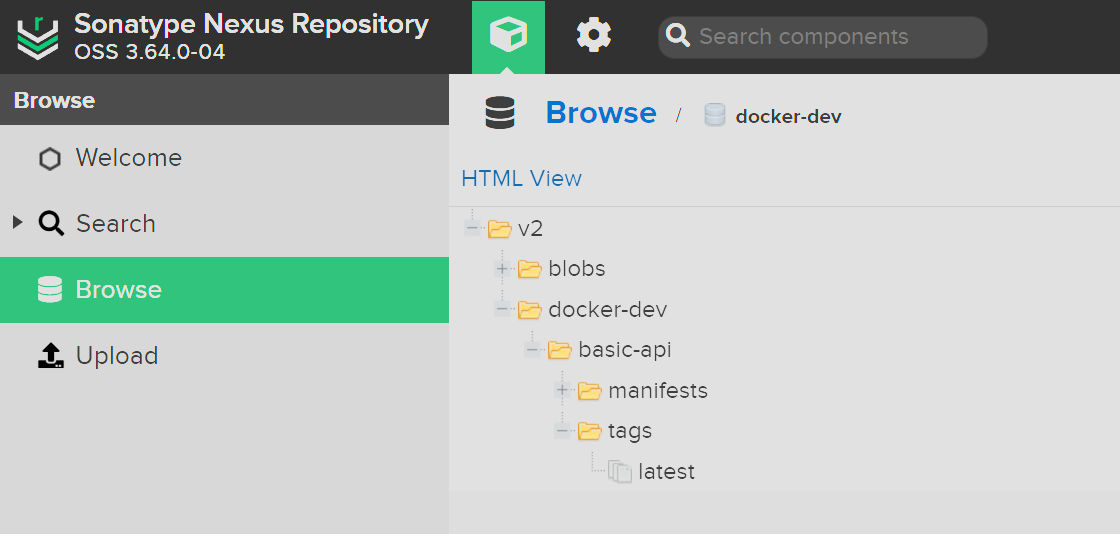
You should now see your docker app in the docker repository you created.