Install MariaDB (MySQL)
Install and Configure MariaDB (MySQL)
#  this command updates all packages to the latest version
sudo yum update -y

# this command installs MySQL server on your machine, it also creates a systemd service
sudo yum install -y mariadb-server

# this command enables the service created in previous step
sudo systemctl enable mariadb

# this command starts the MySQL server service on your Linux instance
sudo systemctl start mariadb

# this command helps you to set root user password and improve your DB security
sudo mysql_secure_installation
The final command, sudo mysql_secure_installation prompts you with a few questions, which may appear as shown below.
# Here, just hit enter as we have not set any password yet
Enter current password forroot (enter fornone):

# Here, reply with Y
Set root password [Y/n]

# Enter new password
New Password:

# Re-enter new password
Re-enter new Password:

## Say Y
Remove anonymous users? [Y/n]

## Say Y
Disallow root login remotely? [Y/n]

## Say N, as we would need them for verification
Remove test database and access to it? [Y/n]y

## Say Y
Reload privilege tables now? [Y/n]y
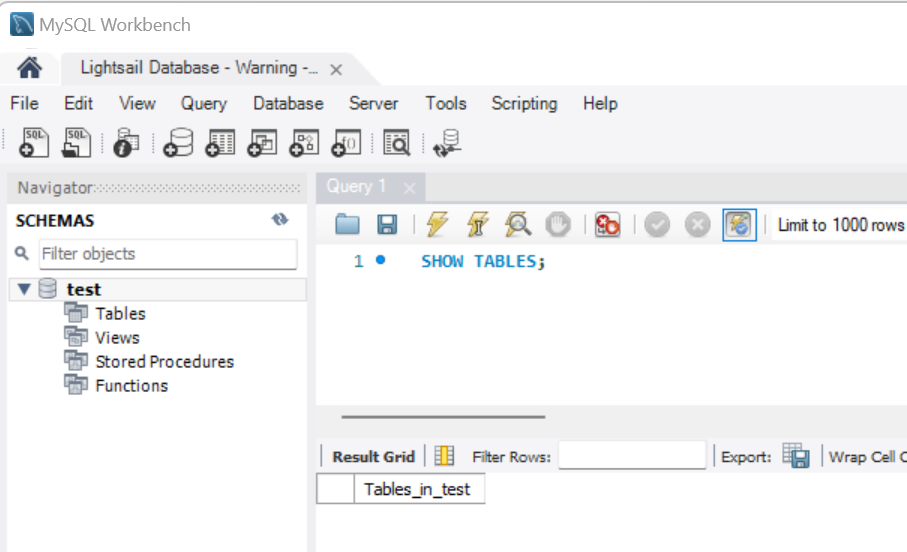
Verify Installation
Now that you've installed MySQL server on your EC2 instance, it's time to make sure it's working properly and you are able to connect to it. So, let us begin the verification process.
To connect to the MySQL instance, run the following command.
Then run the following command
It should print the names of all the test databases. If this prints, we can assume that the MySQL server installation was successful.
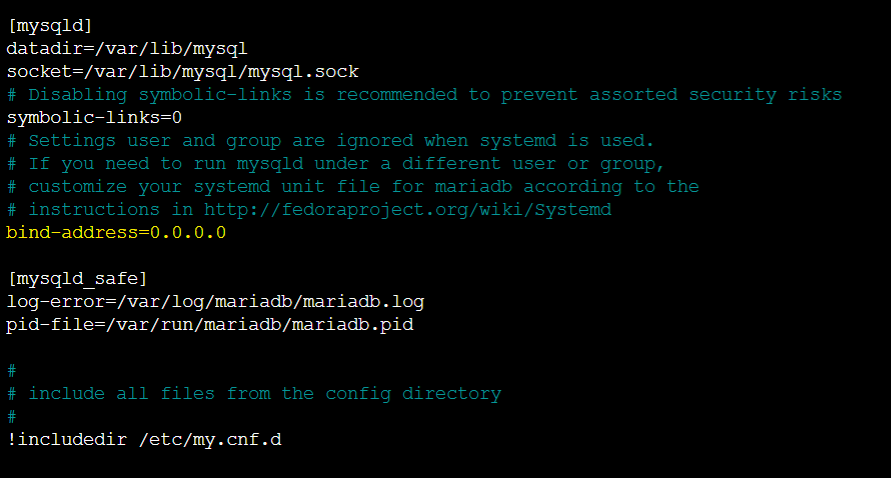
Configure MySQL to accept remote connections
The MySQL server is currently only accessible within the EC2 instance. However, if you want to connect to this MySQL server from your local machine or another server, you must configure it to accept remote connections. Follow the steps below to configure MySQL to accept remote connections.
- Run cd / to go on the root directory.
- Run sudo nano /etc/my.cnf to open my.cnf file in the nano editor.
- Update the file to include bind-address=0.0.0.0 line as well. After update, the file looks like below
Run sudo systemctl restart mariadb to restart the service.
Now execute the following commands on the MySQL server from root user.
CREATE USER 'thomas'@'localhost' IDENTIFIED BY 'thomaspassword';

CREATE USER 'thomas'@'%' IDENTIFIED BY 'thomaspassword';

GRANT ALL PRIVILEGES ON *.* to thomas@localhost IDENTIFIED BY 'thomaspassword' WITH GRANT OPTION;

GRANT ALL PRIVILEGES ON*.* to thomas@'%' IDENTIFIED BY 'thomaspassword' WITH GRANT OPTION;

FLUSH PRIVILEGES;

EXIT
You should now be able to connect to the database with SqlWorkbench on your desktop. Add your static ip as the hostname.
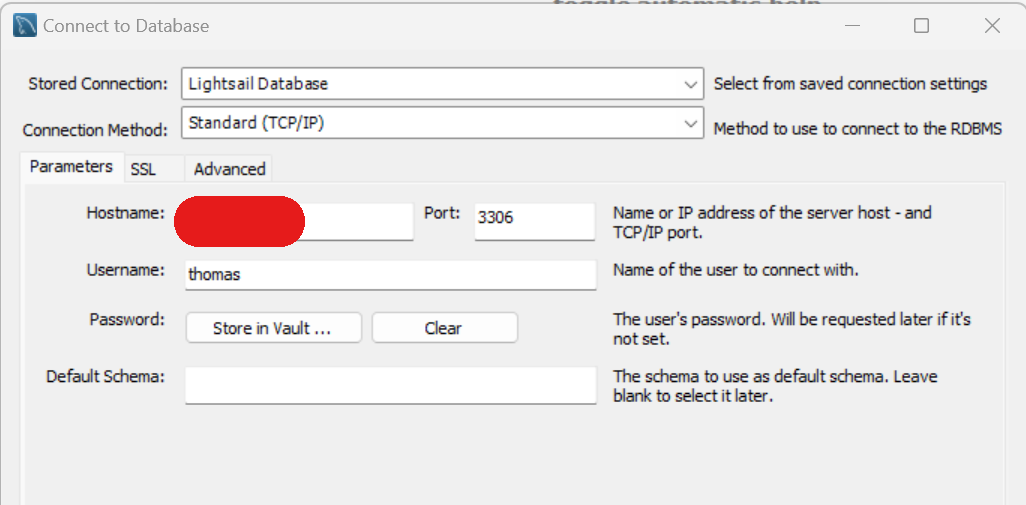
You’ll get a warning because it’s MariaDB but should still get in.